The robotic arm is something that I am really proud of and would like to share with you. It can be used and controlled with a Wii remote
It uses 5 servos to move the claw about and a small geared motor to actuate the claw.
1. Firstly, we need to wire it up to the pi. (Pin numbers):
1. Firstly we need to wire up the PCA9685 to the Raspberry Pi via i2c pins. (Use the pins on the left of the board).
2. Next we need to install a library for i2c usage.
$ - sudo apt-get install python-smbus

$ - sudo apt-get install i2c-tools
3. Reboot
$ - sudo reboot
4. Give permission to use the i2c interface using the command below then navigating through Interfacing Options > I2C > Yes > OK > Finish
$ - sudo raspi-config
5. After that, check that the board is correctly connected: Use the first command if you have an original Raspberry Pi:
$ - sudo i2cdetect -y 0
Use this if you have a second rev Raspberry Pi:
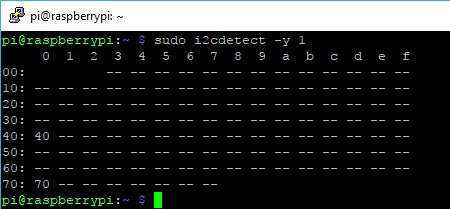
$ - sudo i2cdetect -y 1
If all is connected and set up properly then you should see the following in the terminal:
6. Get and install some more libraries. I got these from Adafruit who made the following files, not me.
$ - sudo apt-get install git build-essential python-dev

$ - cd ~

$ - git clone https://github.com/adafruit/Adafruit_Python_PCA9685.git

$ - cd Adafruit_Python_PCA9685

$ - sudo python setup.py install
7. Next, download the program that I wrote for the arm from our Github:
$ - wget https://raw.githubusercontent.com/fraser148/pi-project-files/master/Arm.py
8. Now that you have the program, wire it all up.
Note: Counting from the bottom.
1. Each of the servos must be connected to the PCA9685 in the following order:
2. On a breadboard, wire up the motor controller (L293D) to the Pi and claw motor like so:

3. The PCA9685 is connected to a 5V source, I use a USB cable with the wires exposed and a 5V mains adapter.
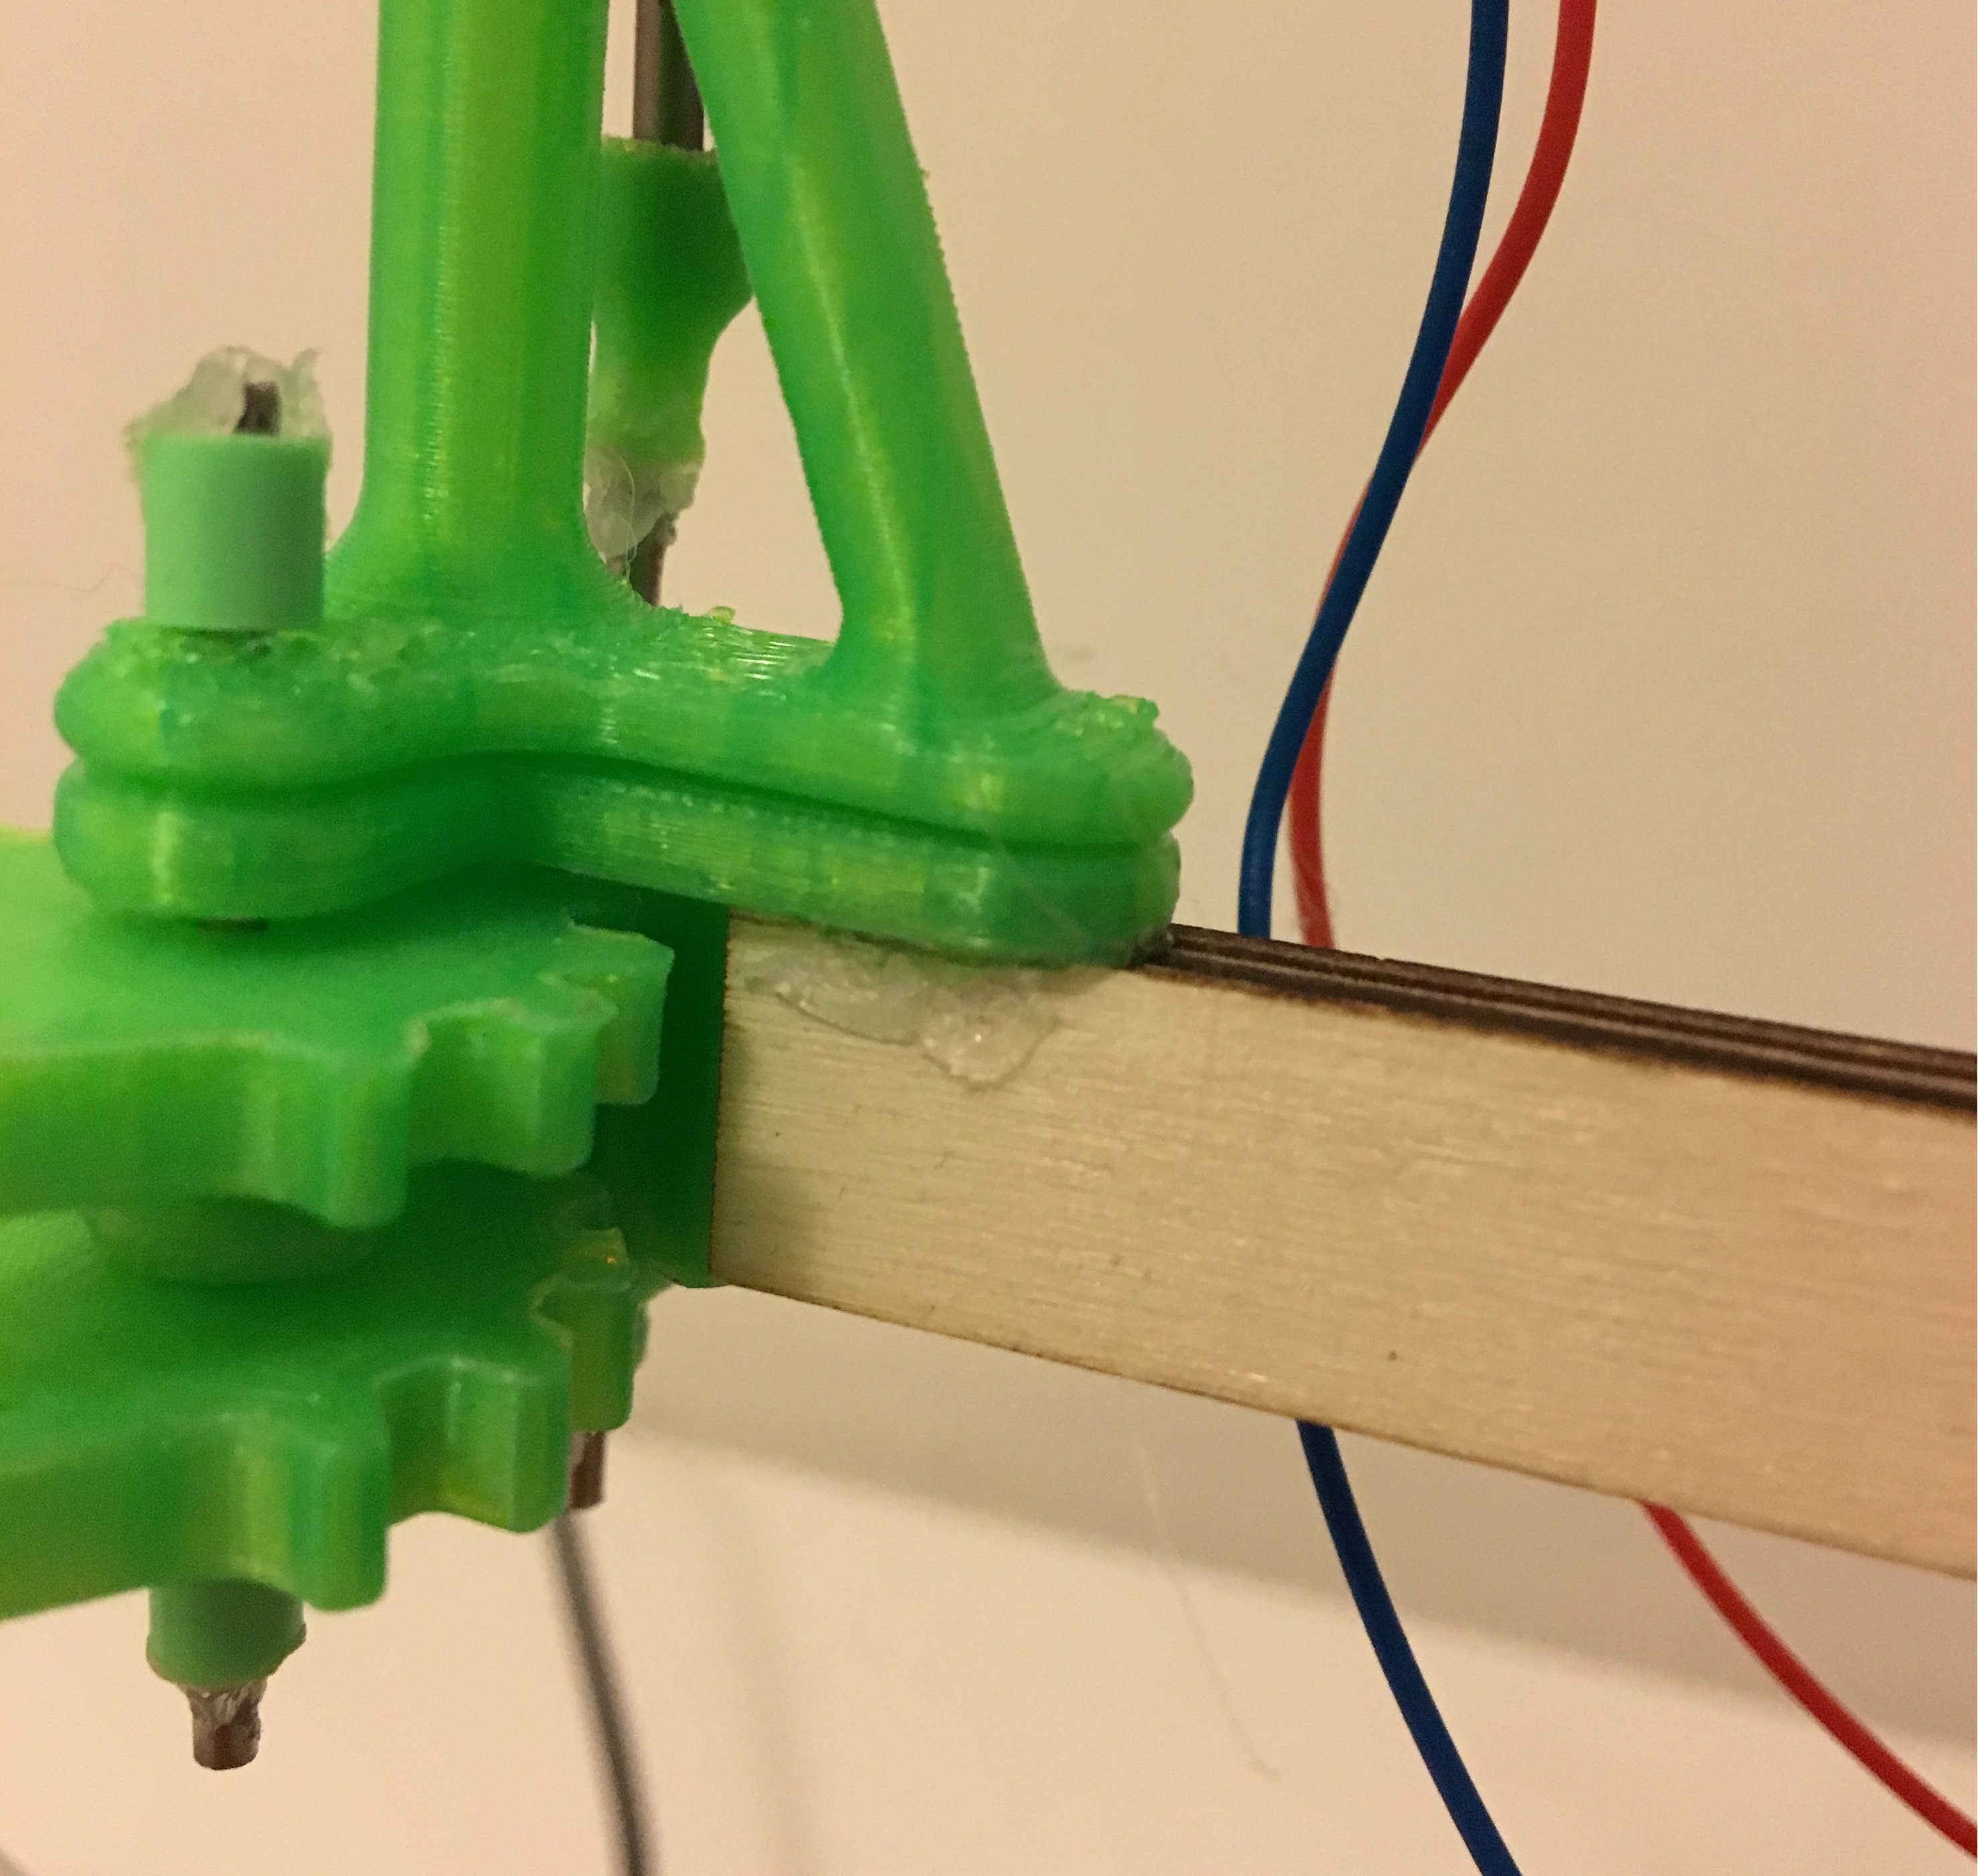
1. The main frame slots together and is held together with glue. The way in which the pieces go together is specific so make sure to assemble before glueing.

The wire for the servo goes through the bottom cover with the head sticking out the top.
2. The arms come in two parts for each. Each look the same but one has two holes that allow for the servo heads to stick onto. Stick these together like so:

3. Using the assembly 3d file, put the parts together using the steel rods and mounting the motor in the hole.

4. The claw is mounted on the arm with some glue like so: