A local network server can be rather useful if you use it well. When I set up my Raspberry Pi server I just help useful information like important dates and cool pictures. I have never used one to it's full potential but I'm sure you can if you have the knowledge of HTML!
We will use the Apache2 software to host the website. Please make sure you have updated and upgraded before this tutorial
NOTE: Not necessary if WiFi is built into your version of Raspberry Pi.
1. First of all, you need to download and install the Apache2 package
$ - sudo apt-get install apache2 -y
2. Unbelievably, that is your website already up and running although I'm sure you'll want to edit it. You can do this by going to the directory in which the index.html file is held and then look inside
$ - cd /var/www/html

$ - ls -al
3. Next you need to give yourself permission to edit the file index.html
$ - sudo chown pi: index.html
4. Now that you can edit the file open it in nano. TIP - To quickly delete the contents of the file hold ctrl + k at the top of the file
$ - sudo nano index.html
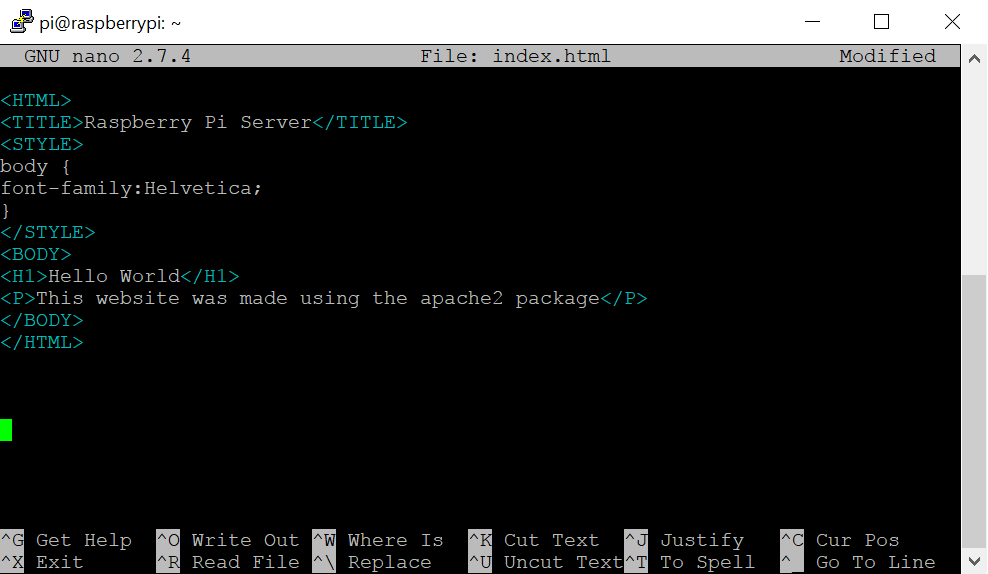
5. If you are unfamiliar with HTML you can use this very basic example code for your website
6. Starting and stopping the web server can be done using one of these commands:
$ - sudo /etc/init.d/apache2 stop

$ - sudo /etc/init.d/apache2 start
This will allow for both HTML and PHP to be used in the file
1. Download and install the PHP package for Apache
$ - sudo apt-get install php libapache2-mod-php -y
2. Delete the index.html file. Make sure you are in the /var/www/html directory
$ - sudo rm index.html
3. Create the index.php file
$ - sudo nano index.php
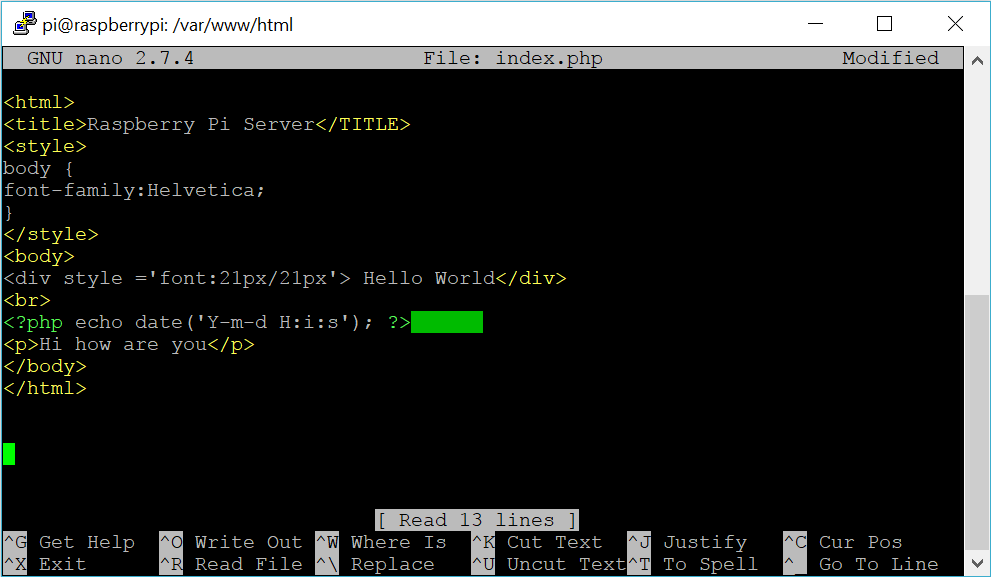
4. Put in some PHP content. This is similar to that if the HTML code but has a date and time.