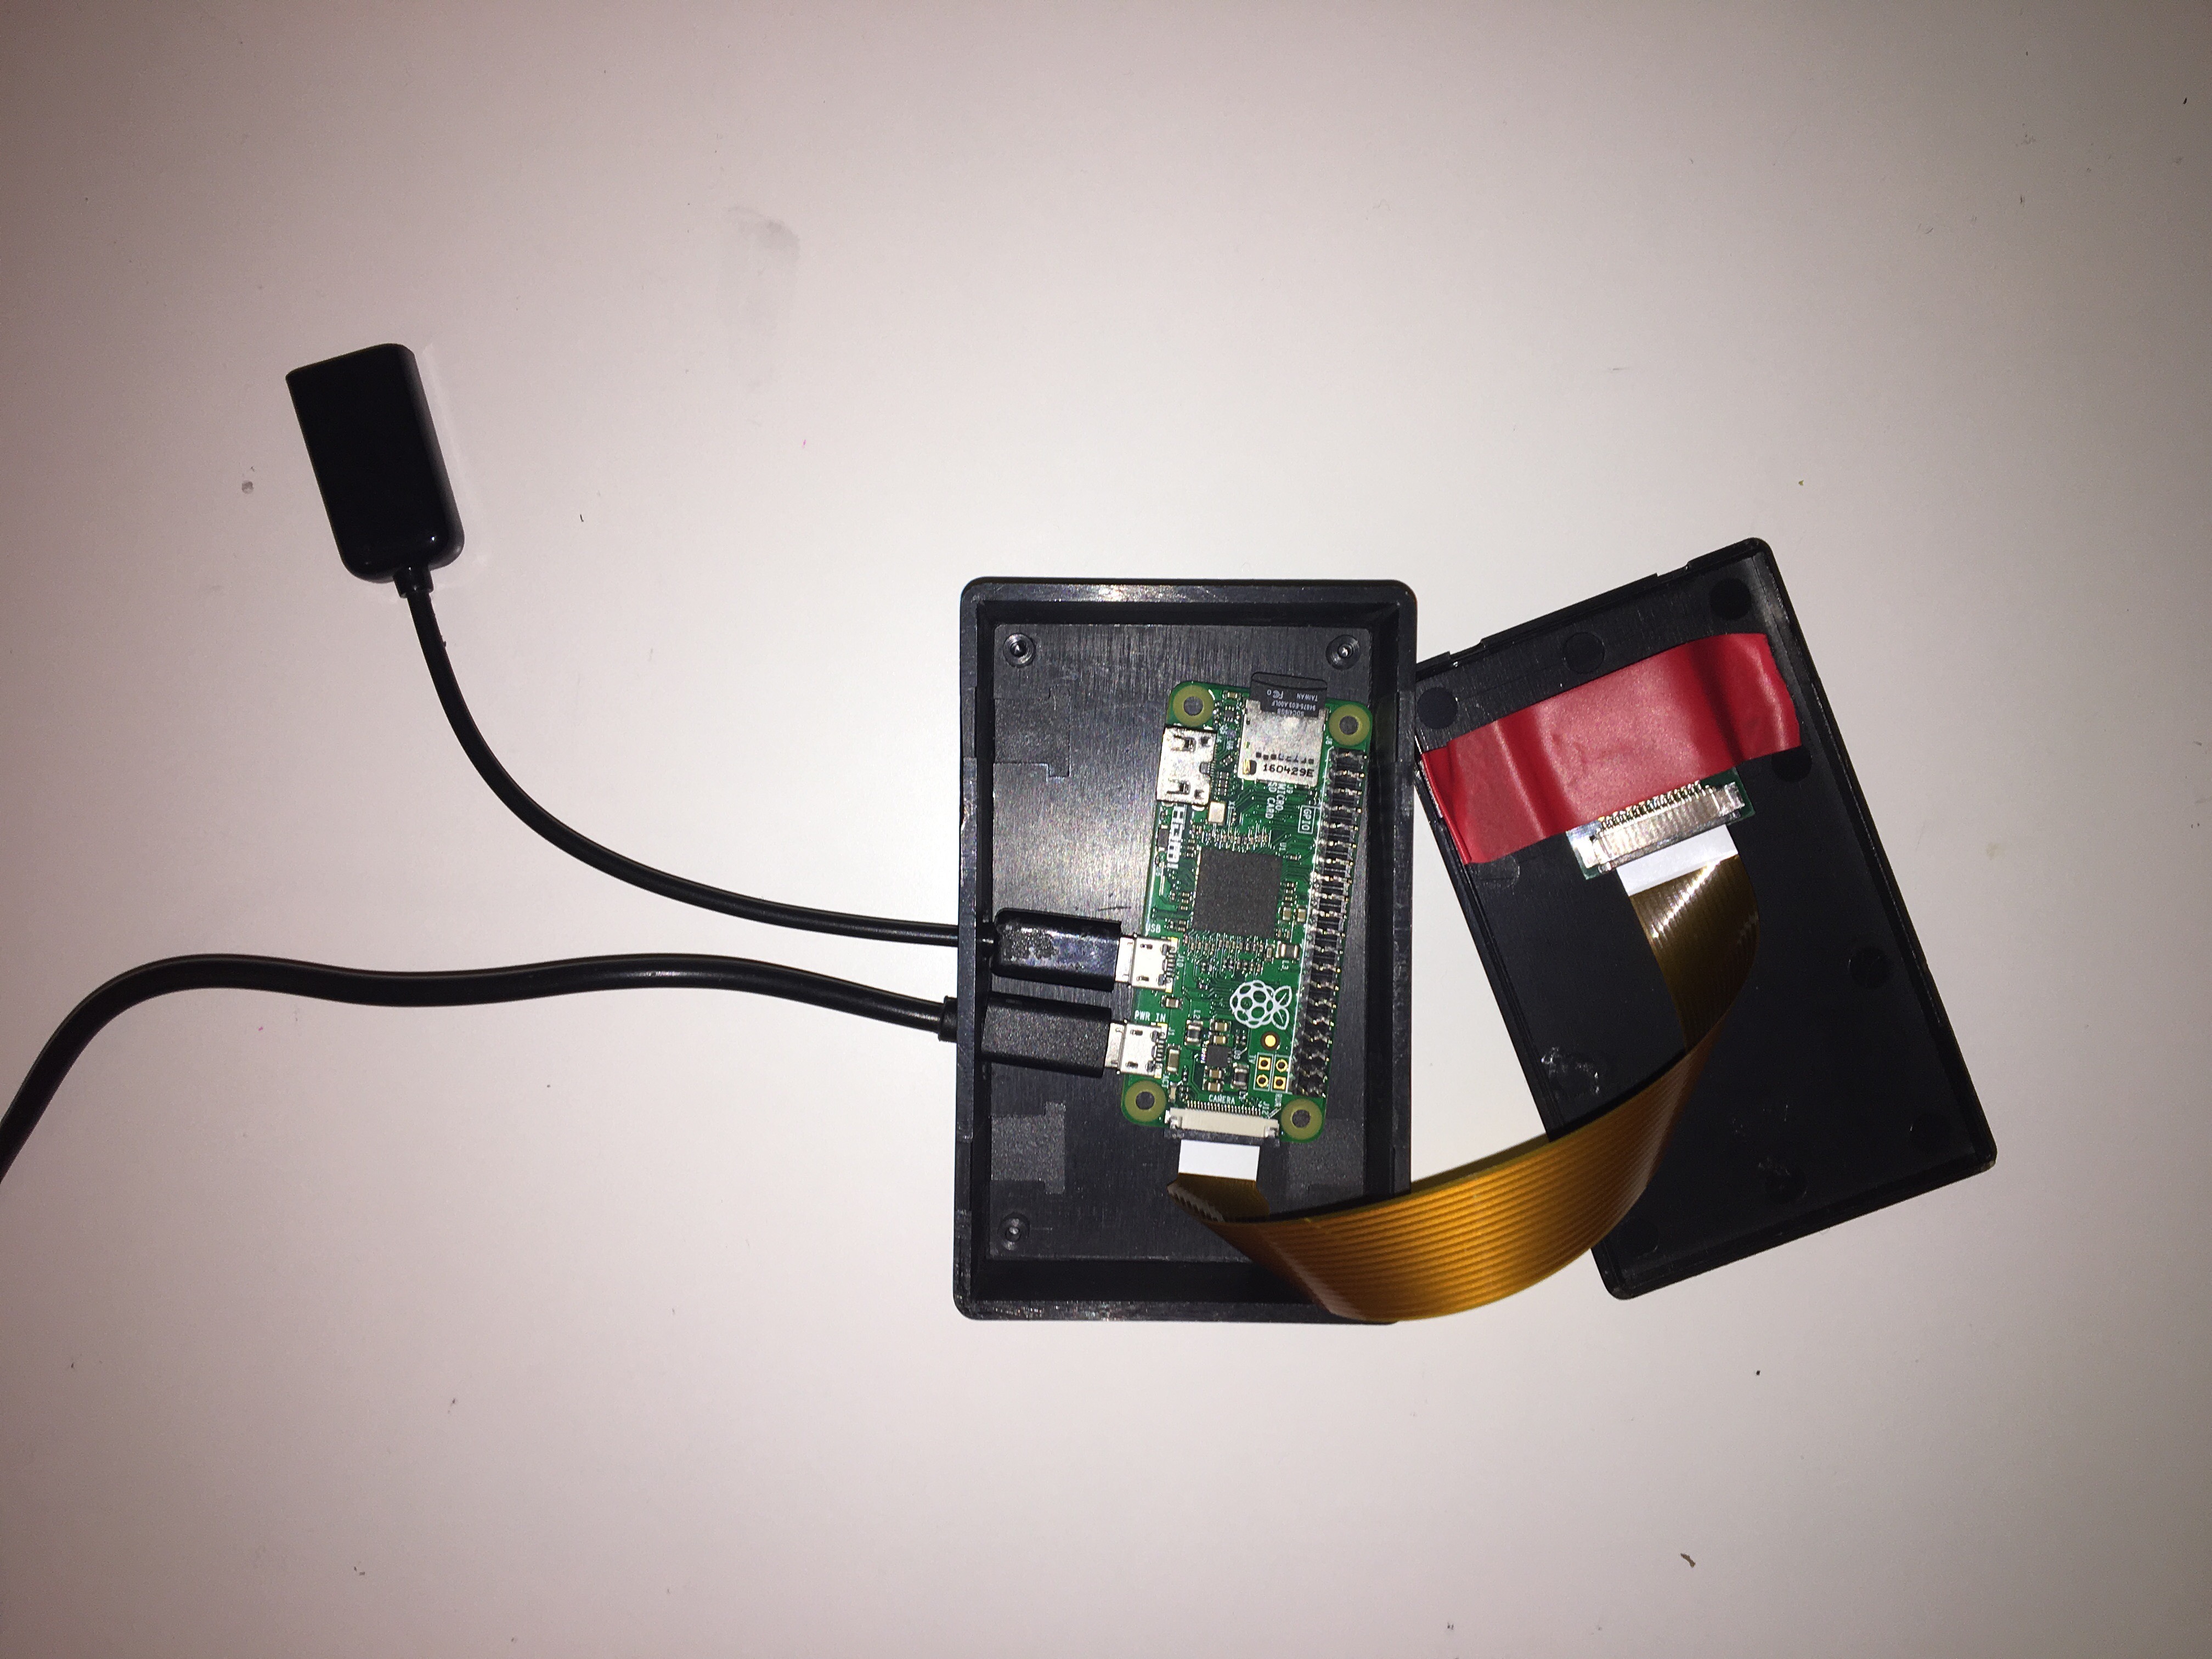
The covert camera uses the Raspberry Pi camera module and the Pi Zero to stream video over your WLAN.
I've come upon many ways to do this but almost all of them require parts to be changed to things that aren't obvious at first. I've compiled a method of downloading and configuring the streaming software first time (fingers crossed).
NOTE: For this covert camera I have used the Raspberry Pi Zero as it is much smaller and will fit in the selected project case although this is not necessary. You may use the larger models of the Raspberry Pi and it will work in the same way. Don't get the Wifi adapter if you have Wifi built in on your version of the Pi.
1. Firstly we need to get some libraries onto the Pi
$ - sudo apt-get install libjpeg8-dev imagemagick libv4l-dev
2. Next we will link these two files for a reason that escapes me
$ - sudo ln -s /usr/include/linux/videodev2.h /usr/include/linux/videodev.h
3. Now this bit is important - download the software
$ - git clone https://github.com/fraser148/mjpg-streamer/mjpg-streamer-code-182.zip
There is a possibility that that step could not work, if that is the case for you, you can go to this website and the .zip file will download. Put the file into your home directory.
4. Unzip the file
$ - unzip mjpg-streamer-code-182.zip
5. Change directory
$ - cd mjpg-streamer-code-182/mjpg-streamer
6. Build MJPG-streamer by adding some necessary plugins for the software
$ - make mjpg_streamer input_file.so output_http.so
7. You can now install MJPG-streamer. Here we copy all of the necessary files into the system directories
$ - sudo cp mjpg_streamer /usr/local/bin

$ - sudo cp output_http.so input_file.so /usr/local/lib/

$ - sudo cp -R www /usr/local/www
8. Create a .txt file with the following code
mkdir /tmp/stream

raspistill --nopreview -w 640 -h 480 -q 5 -o /tmp/stream/pic.jpg -tl 100 -t 9999999 -th 0:0:0 &

LD_LIBRARY_PATH=/usr/local/lib mjpg_streamer -i "input_file.so -f /tmp/stream -n pic.jpg " -o "output_http.so -w /usr/local/www "
9. Save this file as 'stream-script'
10. In the terminal type:
$ - chmod +x /home/pi/stream-script
By running "./stream-script" in the terminal, video will start streaming over your WLAN to your_ip:8080 eg. 192.168.0.31:8080
Also, remember to enable the camera module.
$ - sudo raspi-config
Then navigate to enable the camera, then finish then reboot.
1. Open up a python2 file and add the following code: This is the same code used to start the camera although will be executed by running the python file
import os

import time


os.system("mkdir /tmp/stream")

os.system("raspistill --nopreview -w 640 -h 480 -q 5 -o /tmp/stream/pic.jpg -tl 100 -t 9999999 -th 0:0:0 &")

os.system('LD_LIBRARY_PATH=/usr/local/lib mjpg_streamer -i "input_file.so -f /tmp/stream -n pic.jpg " -o "output_http.so -w /usr/local/www " &')
2. Save the file as "start-camera.py"
3. Go into the boot up file.
$ - sudo nano /etc/rc.local
3. Add the following code to the bottom of the file although make sure that it is above the last line of "exit 0".
sudo python2 /home/pi/start-camera.py
Upon rebooting, the Pi will run this program. It will run it every time it starts up. to stop this go back into the file and remove the command you just put in.
1. Firstly, drill a hole 8mm in diameter. Drill this hole on the centre line but position nearer the top of the case.
2. Then cut out two holes large enough to fit the ends of the micro USB cables through. Put the Pi inside the case to see where you should drill the holes.
3. Tape the camera with the lens through the hole and the plug in the Pi
This is the case opened up to see inside.